


 Title Index
 Recently Changed
 Page Hierarchy
 Incomplete
 Tags
Tags


Preamble
Kappris uses the idea of a printer profile - it doesn't list every physical printer that it can print to - there may be dozens of them. Instead, if you have many printers configured identically, meaning they all have the same form-tray assignment, the same duplex and binding capabilities and so on, then kpmgr will consider all such printers as matching the same profile. It knows it can get identical printout from any of the printers matching that profile - the printers only differ in their geographic position. So in the following examples, when we add a printer driver, what is actually created and listed by kpmgr is a new printer profile, which is the set of identically-specified printers.
Add a new printer profile
Run kpmgr (from the C:\Program Files\Kutana\Kappris folder) and r-click the Printer Profiles node in the left-hand pane. A context menu will appear:
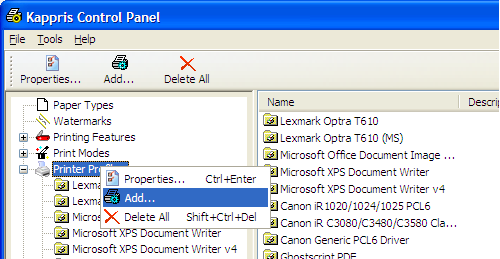
Select the Add… item on the context menu and the following dialog will appear, listing all printers visible from your Windows login:

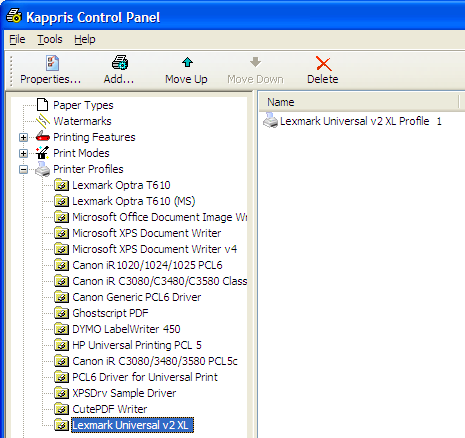
Place a tick next to the new printer you want to add to the collection of printer drivers known to Kappris, then dismiss the dialog with the OK button.
In these notes, the printer we add will be the Lexmark Universal v2 XL. The selected printer appears as a new item at the foot of the Profiles list in the left-hand pane. You can use the Move Up/Down buttons on the kpmgr toolbar to change its position in the list if you like - but this is just for your convenience, as it makes no difference to the behaviour of Kappris whereabouts in the list the printer appears. In the left-hand pane click the newly added printer and you'll see a new Profile item appear in the right-hand pane too:
Double-click the new Profile item in the right-hand pane, and this tabbed UI dialog box will appear:
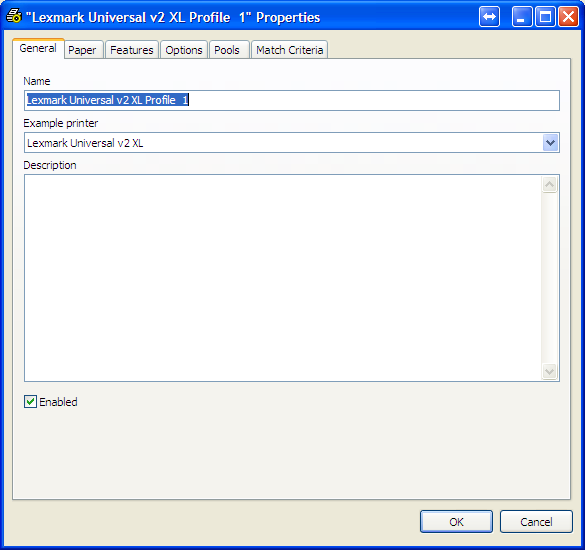
The simplest configuration task you can do is to tell kpmgr the form-tray assignment, i.e what paper is installed in each paper tray in the physical printer. Go to the Paper tab and then choose the paper tray for each paper you intend to use:

Bear in mind that the drop-down list displayed by kpmgr only contains those trays that the Windows printer driver knows about. If the list contains fewer trays than you were expecting you'll need to change the printer driver configuration from the Windows Printers and Faxes folder. R-click the printer in the Windows Printers and Faxes folder and select Properties and check that the driver settings correspond to the physical printer.
Having told Kappris about form-tray assignment, go to the Features tab (next to the Paper tab) and tick those printer features you want to be able to use.
That should be enough to get the new printer to be listed as a possible target when you do a Kappris print from Outlook or Word.
The Refresh Trays button
On the Paper tab, the drop-down list of trays next to each paper name is the set of trays available when you added the driver to kpmgr. If you subsequently change the driver configuration from the Printers and Faxes folder, for instance indicating that you have added a 500-sheet feeder, then in order to get that new tray to appear in the drop-down list just click the Refresh Trays button. The next time you drop one of the lists the new tray will appear.
More advanced settings
Suppose you want printout that is 9-up not just plain simplex or plain duplex. This requires three steps inside kpmgr.
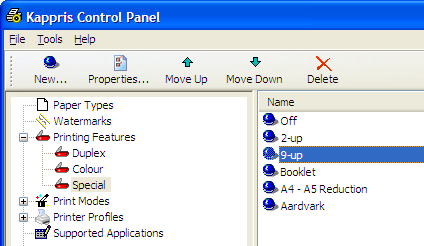
Firstly you'll need to r-click the Printing Features | Special node in the kpmgr left-hand pane and select New… to make this dialog appear:
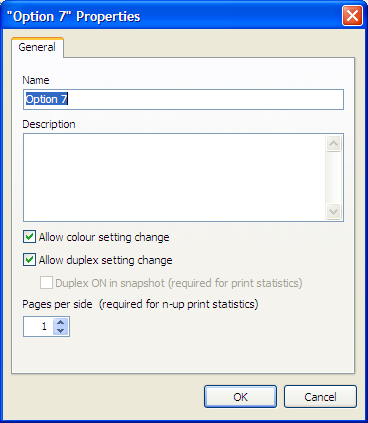
Change the Name to 9-up, and change the Pages per side setting to 9, and finally dismiss the dialog using OK. Then kpmgr will list the new 9-up setting along with the other special Features in the right-hand pane:
The second step is to tell the printer profile to use the new Special feature. By default special features are turned off:
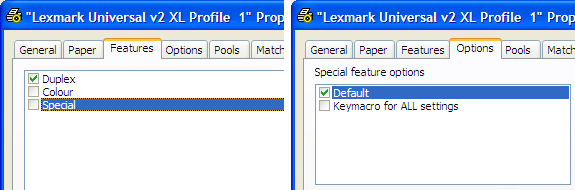
But by ticking Special in the Features list, the Special features are then listed on the Options tab:
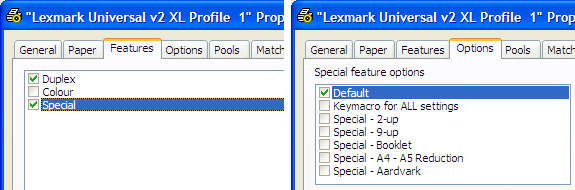
The third and final step is to tell the printer profile how it should behave when it is asked to print using the new 9-up Special Printing Feature. Use the printer's Options tab to make a snapshot of the printer settings that will produce the required style of printing. For instance, to print 9-up from the new printer profile, select 'Special 9-up' in the list:
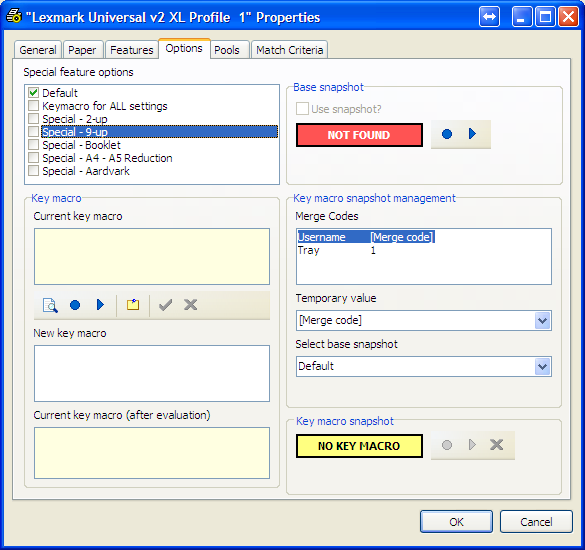
The rectangular flag in the Base snapshot group box goes red to indicate that no snapshot exists that would allow the printer to do 9-up printing.
Press the Record button  on the dialog to record a printer snapshot. The familiar printer driver UI will appear, and you can use it to set up 9-up printing. When you have finished, dismiss the printer driver UI with OK. The rectangular flag will now indicate that the snapshot does exist. For any snapshot marked 'Available' you can press the Play button
  and the printer driver UI will appear with the recorded settings. Bear in mind, when you use the Play button any changes you make to the driver UI will not be remembered - if you want your settings to persist you'll need to use the Record button.
Dismiss the tabbed dialog with the OK button, and then before you close kpmgr, go to File | Publish. This will make the changes visible to all the users sharing the same configuration files in the shared network Kappris folder.
The next time you print using a particular Kappris printmode from Word, any printers matching the Kappris printer profile and which can print that printmode will be listed in the Kappris Print dialog.