Title Index
 Recently Changed
 Page Hierarchy
 Incomplete
 Tags
Tags


SQL Database for Kappris Reporting
Create the Database:
Open SQL Server Management Studio
R-Click Databases on LHS and choose ‘New Database’
Call it ‘KapprisDatabase’ and click OK
Save this file Create JobLoggingDemo Objects.sql locally.
Click on File and choose Open – File and browse to the file saved above.
Click Open.
Now click into the right hand window so that the 'Execute' button becomes live and execute the code.
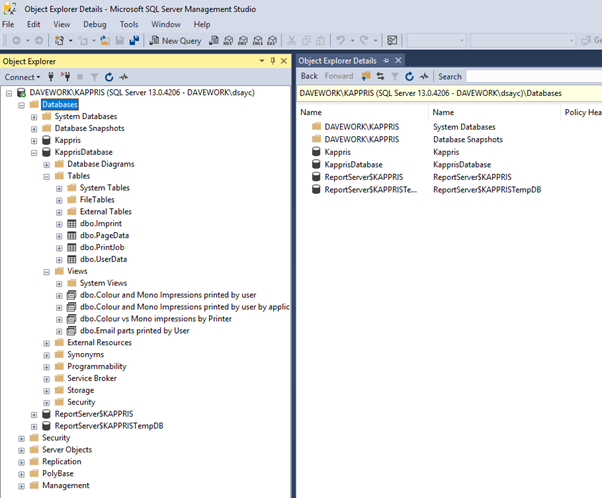
This will populate your new database with new tables for ‘Imprint’, ‘Pagedata’, ‘PrintJob’ and ‘UserData’.
It will also create some standard Views –
Colour and Mono Impressions by User
Colour and Mono Impressions by User by Application
Colour and Mono Impressions by Printer
Email Parts and Total Parts by User
Configure the Connection to the Database:
Copy DataExportConfig.xml to the Central Configuration Folder (CCF) in place of what is there.
Now run ‘DataExportManager.exe’ from C:\Program Files (x86)\Kutana\Kappris
Click Browse next to the Connection String box and configure the connection to the database. Now click Test Connection’ to make sure you have set this up correctly.
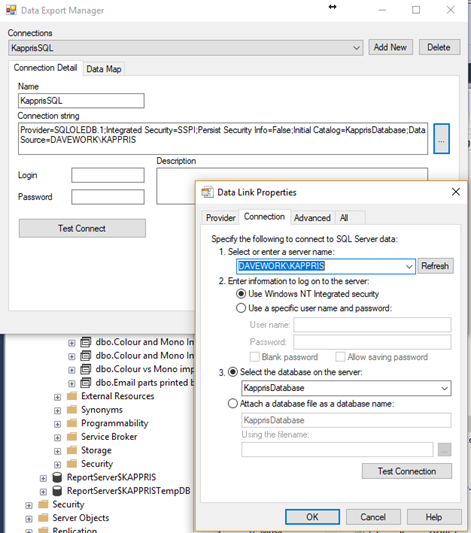
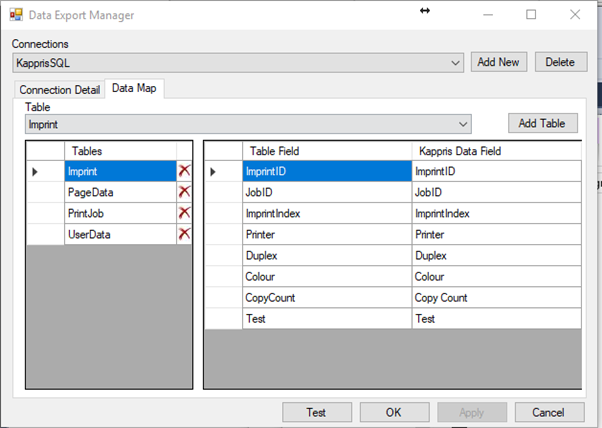
Click OK and then open the Data Map tab.
The tables should already be mapped as per the DataExportConfig.xml that you copied earlier.
Testing the Data Export:
Create the folder structure in your Central Configuration Folder (CCF) like this - CCF\XMLData\UserExportData
Switch on logging of jobs by editing kappris.ini from the CCF as below:
[Options]
Log print job xml=TRUE
For more information review the wiki here.
Print something via Kappris and then run DataExporter from C:\Program Files (x86)\Kutana\Kappris to send the print data into your new database.
You can run DataExporter as a scheduled task on the server to export the data at regular intervals. You will need to install Kappris on the server to make this possible.
In SQL Server Management Studio, highlight one of the views such as ‘Colour and Mono Impressions by User’, now click over on the RHS so that the ‘Execute’ button becomes live.
Click ‘Execute’ to run the query.
You should see some data similar to what is below.
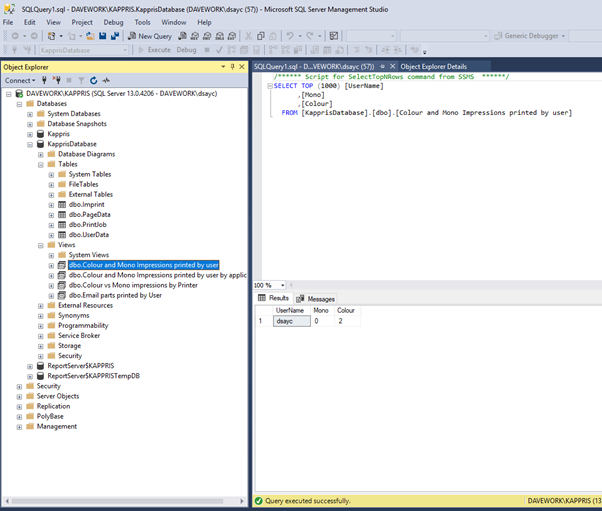
Click in the top LH corner of the results to highlight all rows and columns then r-click and choose ‘Copy with Headers’. You can now paste the results into an Excel document.
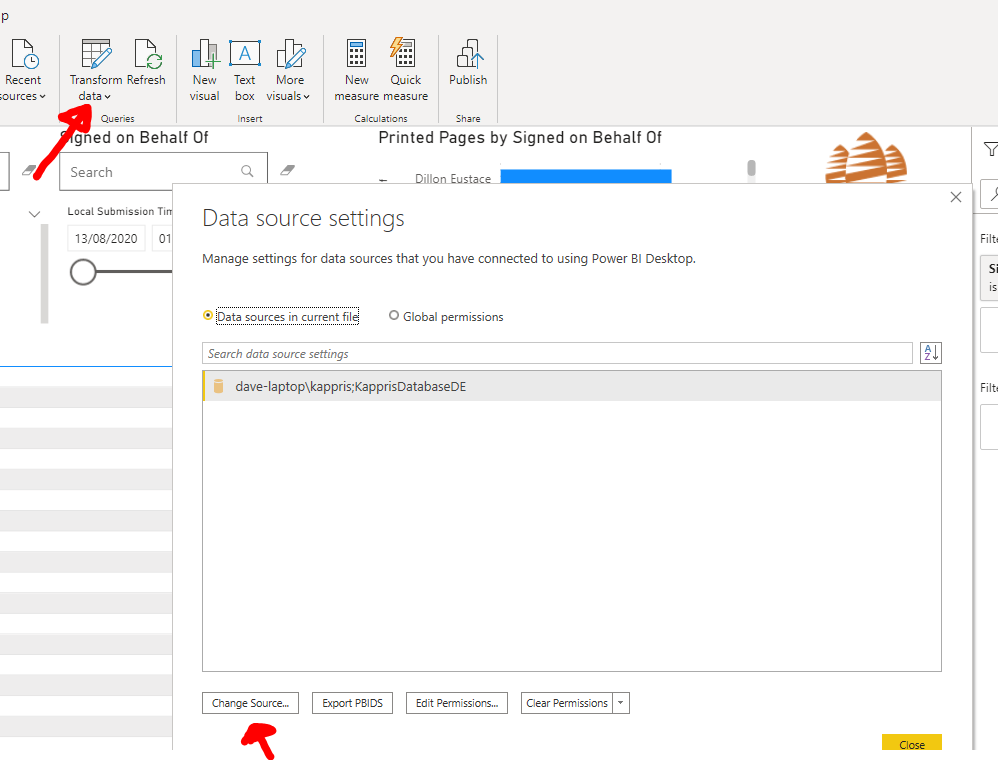
Using PowerBi to look at the data
First run this script to create the required data views. Create_BI_Kappris_Base_Data.sql
Download and install PowerBi desktop if not already installed. You can get it here
Open this file and change the data source to point to your SQL database. KapprisPowerBI.pbix