


 Title Index
 Recently Changed
 Page Hierarchy
 Incomplete
 Tags
Tags


The Kappris WebViewer allows manipulation, comparison and OCR of PDF documents amongst other things.
First check the prerequisites here
These are the components required (current versions at time of writing):
- KapprisFiler.1.0.0.20309.zip
- KapprisSigningServerDeployment.1.0.2.20293.zip
- KapprisWebViewerAPIDeployment.1.0.0.20309.zip
- KapprisWebViewerUI.1.0.0.20309.zip
- WebViewerIManage10Extension.1.0.0.20309.zip
- WebViewerNetDocsExtension.1.0.0.20309.zip
- KFDocusignDeployment.1.0.0.20309.zip
- KFImanage10Deployment.1.0.0.20309.zip
- KFLegalEsignDeployment.1.0.0.20309.zip
- KFNetDocumentsDeployment.1.0.0.20309.zip
Install the websites and plugins
R-click the SetUpWebSite.ps1 file and choose Edit. This should open the file with PowerShell ISE
Edit the domain name to match the client details and click Save.
Now run the installation of each component:
.\SetUpWebSite.ps1 -install -zipFileName KapprisFiler.1.0.0.20309.zip -commitChanges
To uninstall, use the -uninstall switch instead of -install, and you won't need -commitChanges either.
Each of the KF* zip files contains a KapprisFiler plugin. Once you've installed the main KapprisFiler website you can install each plugin with a command line like this:
.\SetUpWebSite.ps1 -install -zipFileName KFImanage10Deployment.1.0.0.20309.zip
This results in the creation and population of a folder like this:
C:\Program Files (x86)\Kutana\Kappris Filer\Plugins\KFImanage10
KapprisFiler scans the .\Plugins folder and loads whatever plugins it finds. This architecture lets us implement multiple plugins targeting various signing agencies and Document Management Systems, and the customer can cherry pick which of them are required.
PowerShell Notes
PowerShell has been part of Windows for years now. You can use it in various ways - you can run a powershell script from the standard command prompt, or you can start PowerShell's own command prompt, or you can use the dedicated PowerShell development environment, Microsoft PowerShell ISE, which is also part of Windows.
- PowerShell ISE does autocompletion - if you start typing the name of a command then press [TAB] powershell will complete the command or let you cycle through the items that match what you've already typed.
- PowerShell ISE does command line switches really well - once you've typed a command, press hyphen and powershell will list the available switches.
- powershell scripts have a
ps1extension, i.e. p s digit one (notpslp s ell). Choice of font can make these hard to distinguish.
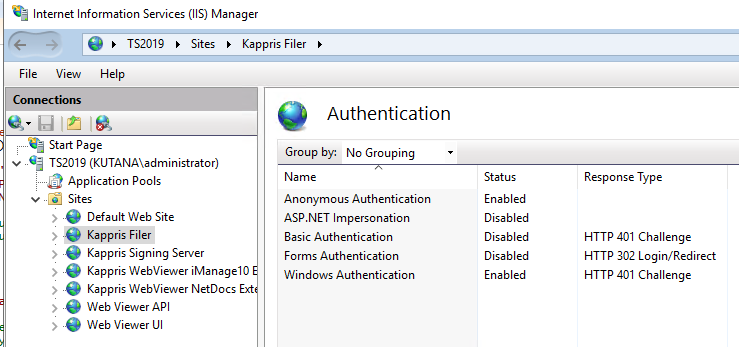
Once complete, open IIS Manager and view the sites that have been created.
For each site double click Authentication and Enable Anonymous Authentication:
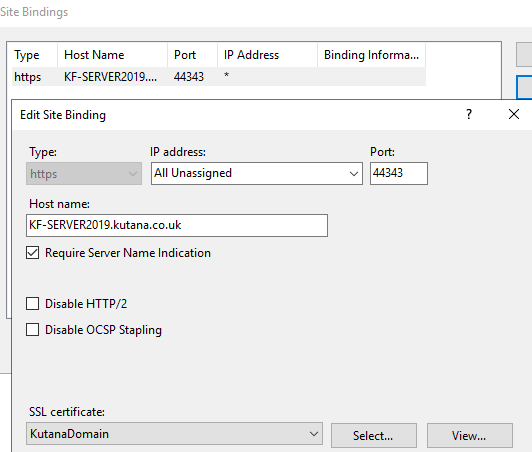
Now check the Bindings and add an SSL certificate for each one (the customer needs to provide this as part of the prerequisites)
Information about how to export/import an SSL certificate can be found here
Ports:
Kappris Filer 44361
Kappris Signing Server 44343
Kappris WebViewer iManage10 Extension 44349
Kappris WebViewer NetDocs Extension 44351
Web Viewer API 44345
Web Viewer UI 44347
Once you have completed the bindings for all the sites restart each server in turn.
Note that KapprisFiler needs 3 bindings (see install notes here)
Now you can test each server by clicking on browse to open the site in Chrome. Set Chrome as default for HTTPS in registry in Computer\HKEY_CLASSES_ROOT\https\shell\open\command.
If you experience 'site not found' check that the new server has been added to DNS.
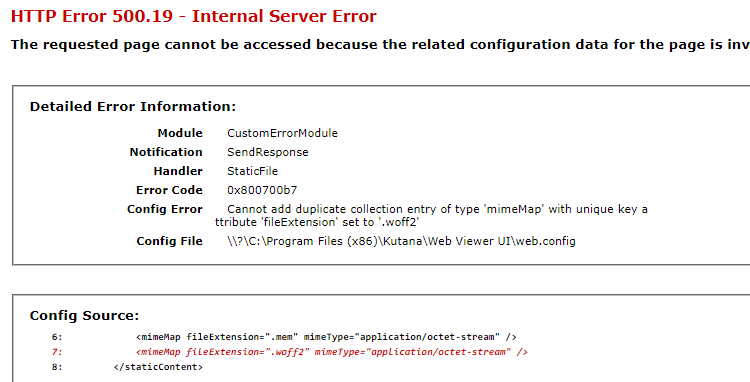
If you see the error below when connecting to the WebViewerUI, edit the web.config file removing the line in question.
Note that you will need to add /webviewerAPI to the end of the address of the WebViewerAPI
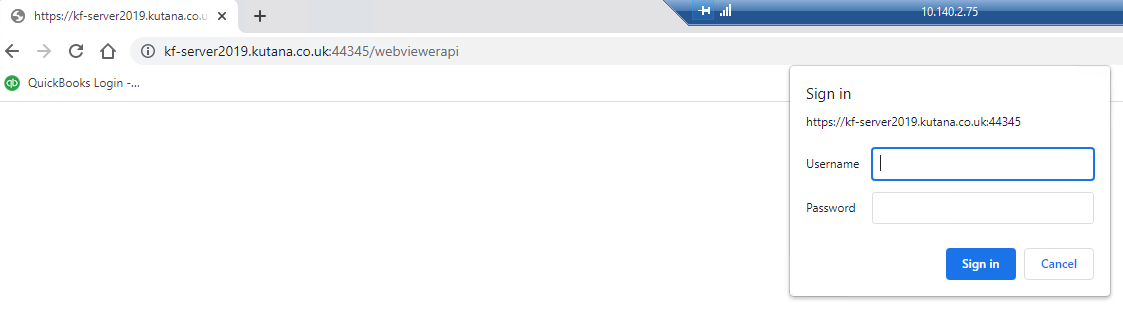
Some sites will ask you to login and others will show a webpage but as long as there are no errors then all is well.
If you see errors or the page will not open, click F12 to see more details and check Event Viewer for errors.
Configure iManage10 (if required)
- Add the iManage Server Application in the Control Center of the iManage server - IManage Server Application.zip having edited the manifest.yaml and KutanaWebViewer.yaml files within to reflect your iManage server, ClientID (Application ID) and Secret.
The ClientID and Secret can be changed to suit the client.
See Send to WebViewer from iManage Setup.docx for more details.
- Edit web.config in C:\Program Files (x86)\Kutana\Kappris WebViewer iManage10 Extension, adding your iManage server and iManage plugin server information similar to below:
  <appSettings>

    <add key="webpages:Version" value="3.0.0.0"/>

    <add key="webpages:Enabled" value="false"/>

    <add key="ClientValidationEnabled" value="true"/>

    <add key="UnobtrusiveJavaScriptEnabled" value="true"/>

    <add key="launchProtocol" value="kappriswebviewerclient"/>

    <add key="iManageServer" value="https://imanage.kutana.co.uk"/>

    <add key="ApplicationId" value="Kutana.WebViewer.WebLaunch"/>

    <add key="Scope" value="user"/>

    <add key="ApplicationSecret" value="8E4FC0C0-B55C-46BF-8D6A-51CAAFD4FB20"/>

    <add key="RedirectUrl" value="https://kf-server2019.kutana.co.uk:44349"/>

    <add key="PluginServer" value="https://kf-server2019.kutana.co.uk:44349"/>

    <add key="FrameAncestors" value="https://imanage.kutana.co.uk https://kf-server2019.kutana.co.uk"/>

  </appSettings>
Final Configuration
See the instructions for Kappris Filer installation here in the following sections:
- LegalEsign configuration
- DocuSign configuration
- Add settings into the environment
If Kappris Filer is not being used then ignore the sections relating to that specifically.
Web Viewer Client Deployment
- Go to \\busdata\company\Release\WebViewer\v1.0.0.20309 and install KapprisWebViewerClient.1.0.0.20309.msi
- Go to C:\Program Files (x86)\Kutana\Web Viewer Client and open KapprisWebViewerClient.exe.config in a text editor.
Note: you'll need to be running as Administrator to be able to save changes you make to this file.
Ensure the <appsettings> element at the top of the file points to your WebViewer server and looks something like this:<appSettings> <add key="api_url" value="https://KF-Server2019.kutana.co.uk:44345" /> <add key="viewer_url" value="https://KF-Server2019.kutana.co.uk:44347" /> </appSettings>
-
If iManage10 is being used you will also need to edit the kwcWebViewerIntegration.IManage10.DesktopClient.dll.config file similar to below:
<?xml version="1.0" encoding="utf-8" ?>
<configuration>
  <appSettings>
    <add key="Server" value="imanage.kutana.co.uk"/>
    <add key="ClientId" value="Kutana.WebViewer.WebLaunch"/>
    <add key="ClientSecret" value="8E4FC0C0-B55C-46BF-8D6A-51CAAFD4FB20"/>
    <add key="PluginServer" value="https://kf-server2019.kutana.co.uk:44349" />
  </appSettings>
</configuration>
Double click IManage 10 Web Viewer ProtocolHandler.reg to add the registry change which opens the WebViewer Client when needed.
- Set up other defaults as per ClientInstallInstructions.txt
- Edit ContactLookup.json in C:\Program Files (x86)\Kutana\Web Viewer Client to enable lookup into SQL etc.
-
Now run KapprisWebViewerClient.exe and the Client icon will appear in your System Tray:

Original (deprecated) guides are here and here.