


 Title Index
 Recently Changed
 Page Hierarchy
 Incomplete
 Tags
Tags


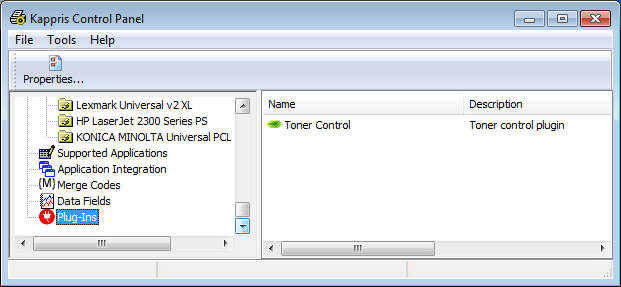
Once you have installed TonerSaver you can configure it from the Kappris Control Panel. Run kpmgr and select the Plug-Ins node in the treeview control in the left-hand pane.
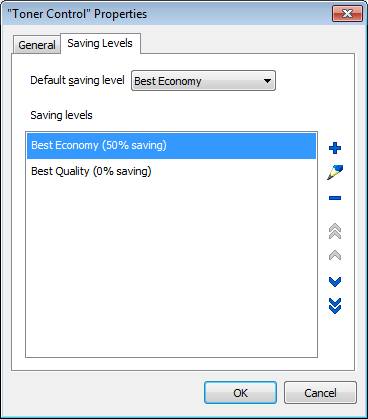
Double-click the Toner Control node in the right-hand pane and the "Toner Control" Properties dialog will appear (see below). The simplest possible configuration is to have just two settings: Best Economy which has the highest possible degree (50%) of toner saving and Best Quality which does not modify the printout at all - it has no toner saving. You can add these by clicking the  button to the right of the combobox control. Of course you can add more levels if you need to. You can also choose a different naming convention for the levels if you like. You must also specify the Default saving level, which is inherited by every imprint of every printmode (but can be modified for each imprint - see later).
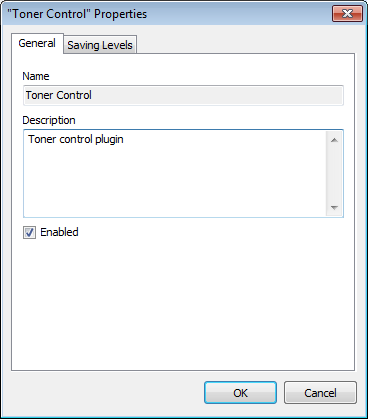
Having defined the set of toner saving levels, go to the General tab and tick Enabled.
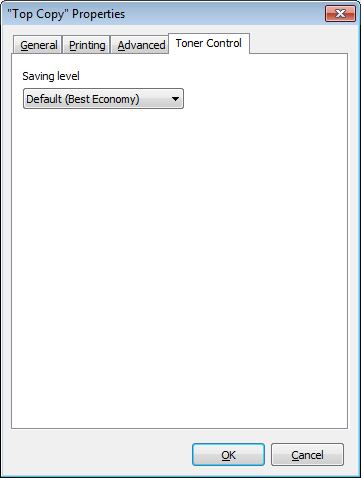
Ticking the Enabled checkbox causes a Toner Control tab to be added to each imprint in each Print Mode. You can see the Default saving level is the one defined earlier on the Toner Control tab:
For maximum savings, you could set the default saving level to Best Economy, and explicitly set the level to Best Quality for only those documents (ones you send out to customers) that really need to be best quality.
Ninja Settings
If you need to modify any of the app exclusion settings, then these are the steps you need:
- Run TSSettings.exe
-
In the top right-hand corner, drop the menu next to the cog:
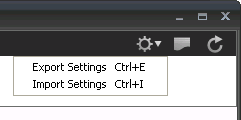
and select Export Settings. - Save the settings to an xml file.
- Modify the xml file carefully.
-
For the sections you have modified, change the TimeStamp value to some date in the future. TimeStamps start with the year, so the easiest thing is to change it to next year. In the following snippet, you'd change 2015 to 2016:
<Chunk Name="TSUserSettings"> <TonerSaver> <TimeStamp Value="20150225153053"/> <UserSetting> <BasicSetting> <EnableUseTonerSaver Enable="true"/> <DefaultSavingRate Value="30"/> <EnableUseSlidebar Enable="true"/> . . . - Import the changed file back into TSSettings. If you then Export again, you should see your changed settings, but the TimeStamp will have changed to the current date/time.