


 Title Index
 Recently Changed
 Page Hierarchy
 Incomplete
 Tags
Tags


Introduction
Each time you print to the Ghostscript PDF Printer, it creates a new PDF file in the designated target folder. Other PDF drivers pop a dialog asking you to name the PDF file, but Ghostscript PDF constructs the target filename for itself automatically.
Prerequisites
gs921w64.exeorgs921w32.exedownloaded from https://www.ghostscript.com/download/gsdnld.htmlmfilemon-setup.exedownloaded from https://sourceforge.net/projects/mfilemon/
Note: If you download a ghostscript version later than 9.21 that's fine - but you need to know what version it is to be able to set up mfilemon properly.
Installation Steps
- Install ghostscript - Running as Administrator, install ghostscript by running the exe. This creates folder whose name incorporates the version number, e.g.
C:\Program Files\gs\gs9.21 - Install mfilemon - Run the mfilemon-setup.exe installer.
- Install the GhostscriptPDF printer and connect it to a port instance of the Multi File Port Monitor.
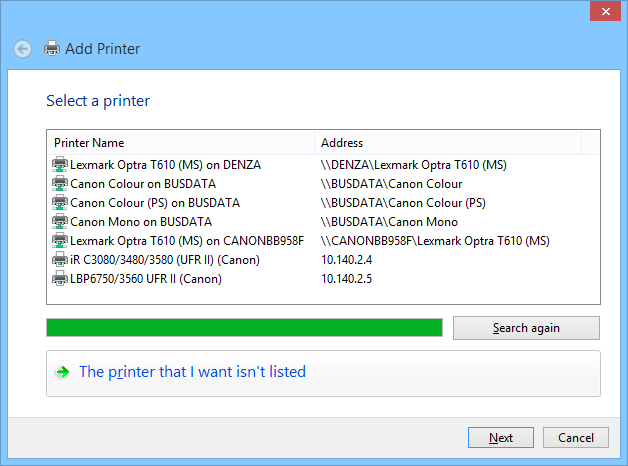
- From the Control Panel, open the Devices and Printers window and click Add a printer.
- Click The printer that I want isn't listed.
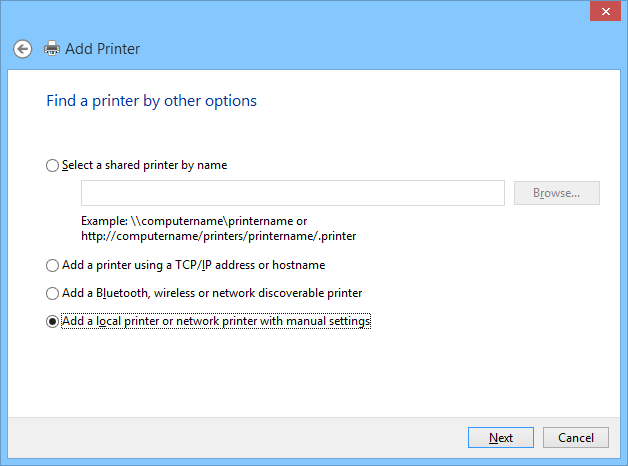
- Select the Add a local printer or network printer with manual settings radiobutton and click [ Next ]:
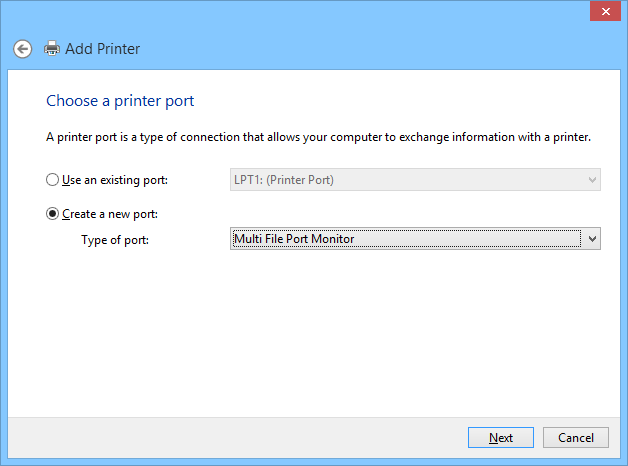
- Select the Create a new port radio button and choose Multi File Port Monitor from the drop down. Click [ Next ]:
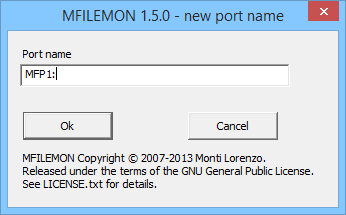
- A small dialog will appear asking you to give a name to the new instance of the Multi File Port Monitor. Give the new port the name MFP1: and dismiss the dialog with [ OK ]:
- The larger MFILEMON port configuration dialog will appear, and all its fields will be blank. Fill the fields using this screenshot as a guide:
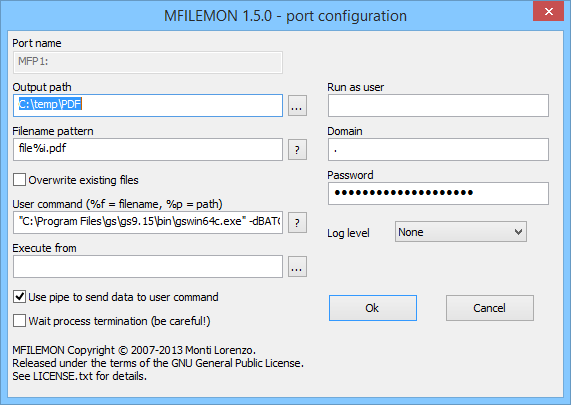
Output path should be an existing writable folder- we useC:\Temp\pdf
Filename patternfile%i.pdf- the created pdfs will have names file0001.pdf, file0002.pdf, etc.
User command"C:\Program Files\gs\gs9.21\bin\gswin64c.exe" -dBATCH -dSAFER -dNOPAUSE -sDEVICE=pdfwrite -dPDFSETTINGS=/prepress -dAutoRotatePages=/PageByPage -r600 -sOutputFile="%f" -Note how the version number 9.21 appears in the executable file path. Note also that the command ends with an important trailing hyphen.
Use pipe - on Windows 7 and 8 check this - on Win 10 leave it unchecked.
Leave the other fields at their default settings.
Click [ OK ] - The Add Printer dialog will reappear again. Click [ Have Disk... ]
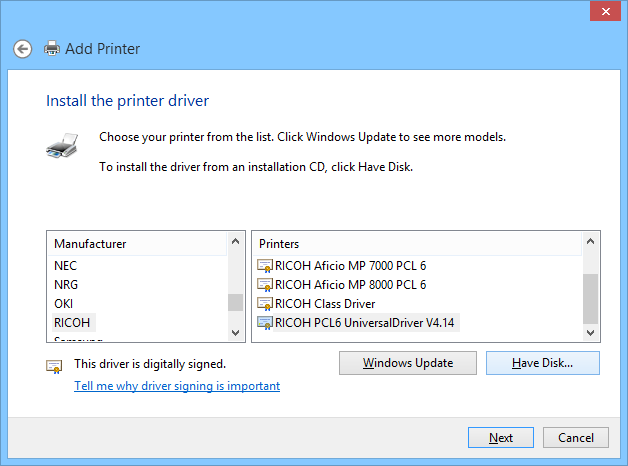
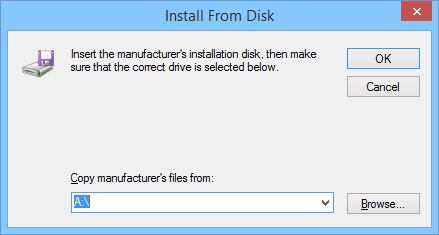
- The Install From Disk dialog appears - Click [ Browse ], navigate to C:\Program Files\gs\gs9.21\lib and select ghostpdf.inf
Note: Earlier versions of the ghostscript driver were not accompanied by a signed cat file, so the Add Printer wizard would warn that the driver was unsigned. This problem is fixed at ghostscript 9.21 and later. - You should be able to click through all the other panels in the Add Printer Wizard.
- Try a printer Test Page and then check to see that a pdf file has been created in your designated folder.